Well, If you are searching the way to Delete eSIM iPhone then you are on right place. Here We give you a complete guide to do this step by step so keep reading full article and solve your issue.
Table of Contents
ToggleIn today’s mobile world, the regular SIM card has a digital cousin called an eSIM, short for embedded SIM. An eSIM offers a cool advantage: you can switch between phone plans without needing to deal with a tiny physical card. If you’re an iPhone user who wants to manage your eSIM, follow this easy guide to get it done step by step.
Whats We Will Discuss In This Post
In this post we give you a complete guide to Delete eSIM iPhone. Using these steps you will save your a lot of times. So let’s create a heading plan on which we will talk with you :
- What’s an eSIM?
- How to use eSIM iPhone
- Delete eSIM iPhone


What's an eSIM?
An eSIM is like a virtual SIM card inside your phone. It lets you connect to a cell network without needing a physical card. This is especially handy for people who travel, use phones with two SIMs, or switch plans a lot. Its means that iPhone team given only single sim slot in iPhone but the team give you opetion to use eSIM in your device. Its work like real sim card.
An eSIM, which stands for “embedded SIM,” is like a tiny digital card that’s already inside your phone or other devices, like tablets and watches. It’s not something you can take out or touch like a regular SIM card.
With an eSIM, you can set up your phone to connect to a mobile network without needing to put in a physical card. It’s pretty cool because you can switch between different phone plans without changing any cards – you just change some settings on your device.
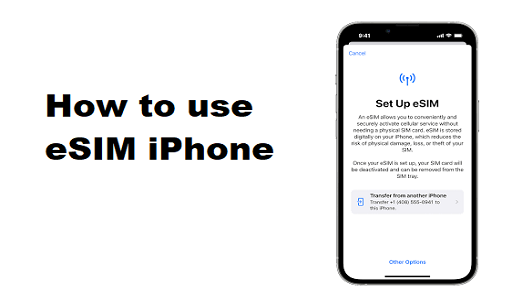
How to use eSIM iPhone
Setting up an eSIM on your iPhone is easy. First, make sure your iPhone model can use eSIMs. Ask your phone company for the eSIM setup information, which they’ll give you as a special code or picture. then follow these simple steps to setup eSIM
Then, go to your phone’s “Settings,” find “Cellular” or “Mobile Data,” and tap “Add Cellular Plan.” If you have a QR code, scan it with your phone’s camera. If not, type in the code or follow the link your phone company gave you.
Confirm your choices and choose if you want the eSIM as your main plan if you have another SIM card too. Your iPhone will finish the setup, and your eSIM will be ready to use for calls and data! Just follow these steps, and you’ll be connected in no time.
Delete eSIM iPhone
If you are changing your iPhone and going to use another device then you need to Delete eSIM iPhone. For this you need to follow these simple steps one by one. Let’s see :
Step 1: Open Settings
Unlock your iPhone and find the “Settings” app. It looks like a little gear and usually lives on your main screen.
Step 2: Go to Cellular Settings
Scroll down in Settings until you see “Cellular.” Tap on it to find all your cell-related settings.
Step 3: Find Cellular Plan
Inside the Cellular settings, you’ll see an option called “Cellular Plan.” Tap on this to work with your eSIM.
Step 4: Select Your eSIM
You’ll find a list of eSIMs connected to your phone. Just pick the one you want to manage by tapping on it.
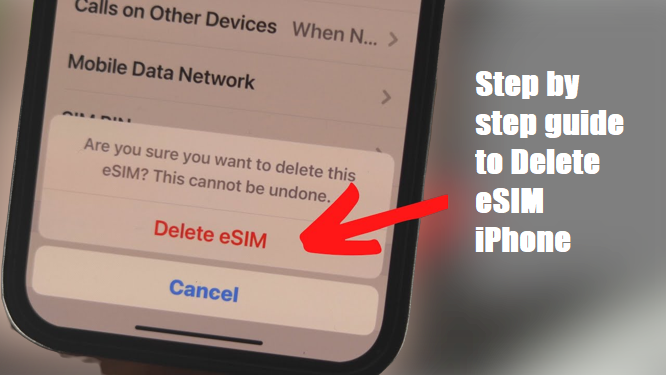
Step 5: Remove the eSIM
On the eSIM info page, look for an option to “Remove Cellular Plan” or something similar. This is how you start getting rid of that eSIM.
Step 6: Confirm Removal
Your phone will ask if you’re sure about removing the eSIM. Say yes if you want to remove it.
Step 7: Delete eSIM iPhone
After you confirm, the eSIM you chose will Delete eSIM iPhone from your phone. You’ve successfully taken care of your eSIM.
Remember While Doing This:
Before you remove an eSIM, make sure you have another way to stay connected, like a regular SIM card. Different iPhones and carriers might have slightly different ways to do this. If you’re lost, check with the people who sold you the phone or your cell service provider. Save any important stuff before you start changing settings
If you need to add after this then , If you need to add an eSIM, your cell company will give you a QR code to scan. eSIMs make life easier for iPhone users who want to change their cell plans. You don’t need a little card to switch things up anymore. Just follow the steps in this guide, and you’ll be a pro at handling your eSIM on your iPhone.